The help information provided on this page provides details on managing the life-cycle of an AQIPP entry. The help is broken up into primary sections. Use the Table of Contents links below for quick access to each section.
Table of Contents
- AQIP Entry Workflow
- Application Form
- Managing the List Table
- Emails
- Back-end Reports
- Why are my photos rotated when I upload?
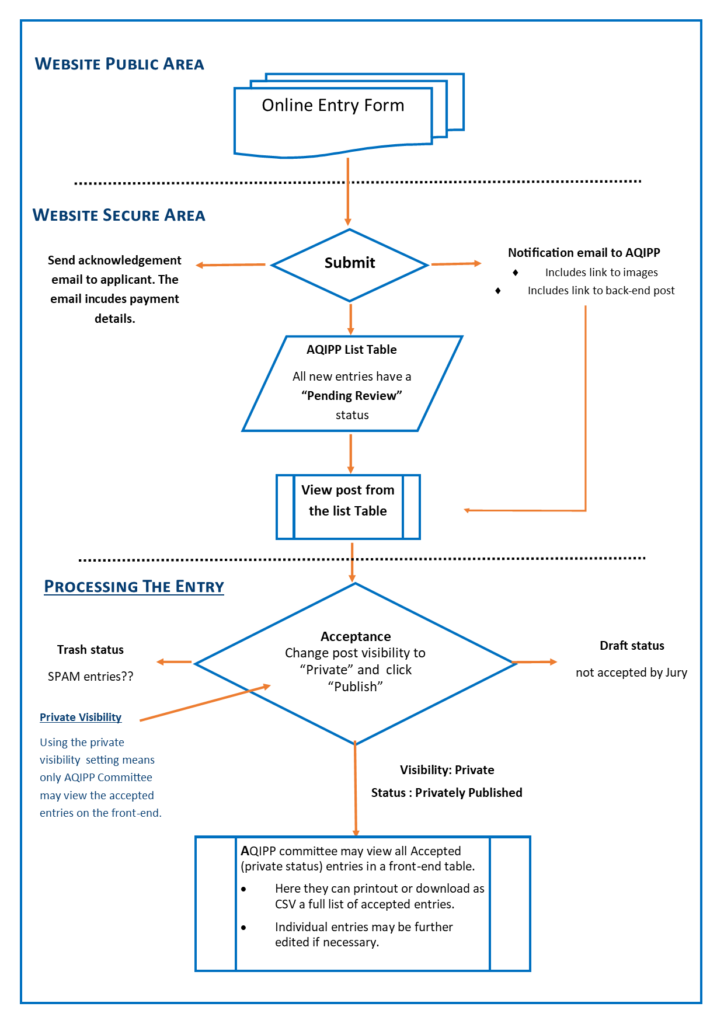
AQIPP Entry Workflow
Below is the basic work-flow for every new AQIPP online entry.
- All AQIPP entries must use the front-end application form. This form is available to the public to add their entry. Applicants must completely fill out the form for each entry.
- After submission, emails are sent to the AQIPP Committee, and an acknowledgement email is sent to the applicant.
- New entries are available on the back-end with a “Pending Review” status. “Pending Review” means “ I think this post is ready for someone to review, approve and publish”.
Application Form
The application form is the key element of the online solution. The form includes required fields, error checking, and notes to guide the applicant. Here is an example of a form ready for submission.
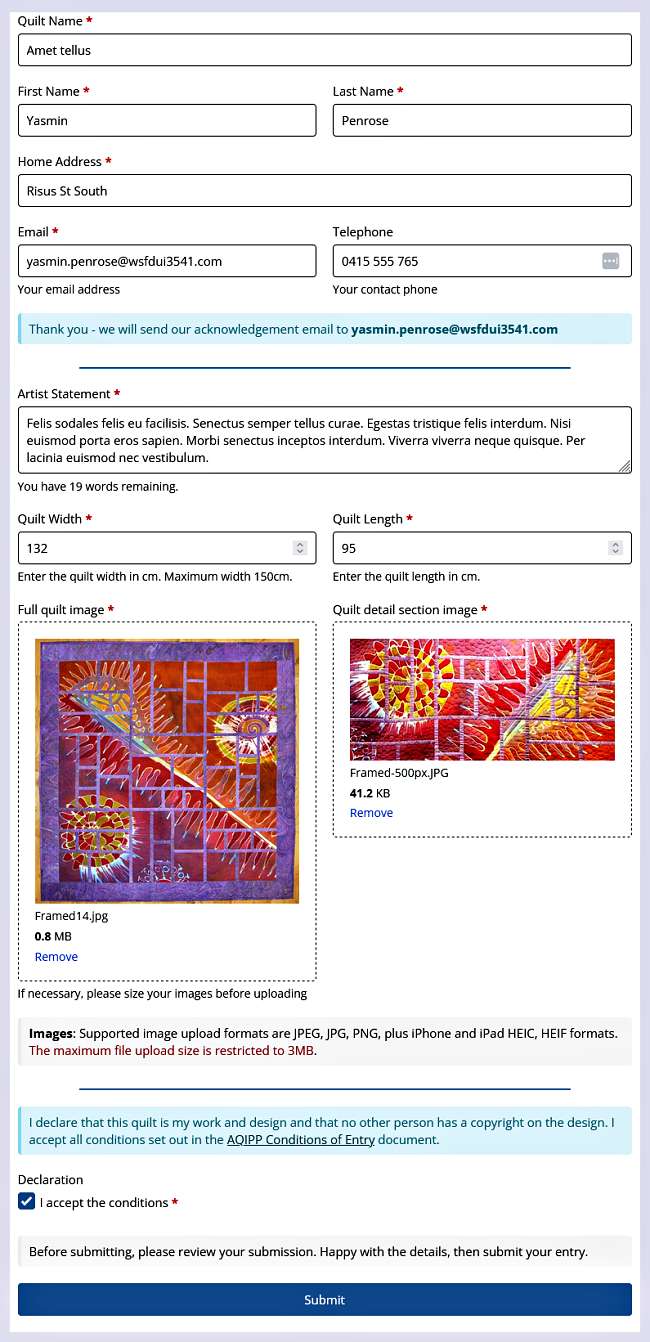
Successful submission message from the front-end form.

Managing the AQIPP List Table
All entries submitted are listed in the AQIPP List Table. Here, you can edit the post or update the status of any entry. For quick visual recognition, the “Post Status” has been colour-coded. AQIPP entries have the following statuses:
- Pending Review (yellow)- default status for new entries. Ready for someone to review, approve and publish
- Draft (purple) – not accepted
- Trash (black)- junk, possibly SPAM
- Private (blue) – the entry is accepted. Privately published entries are only visible to the AQIPP Committee on the website’s front-end.
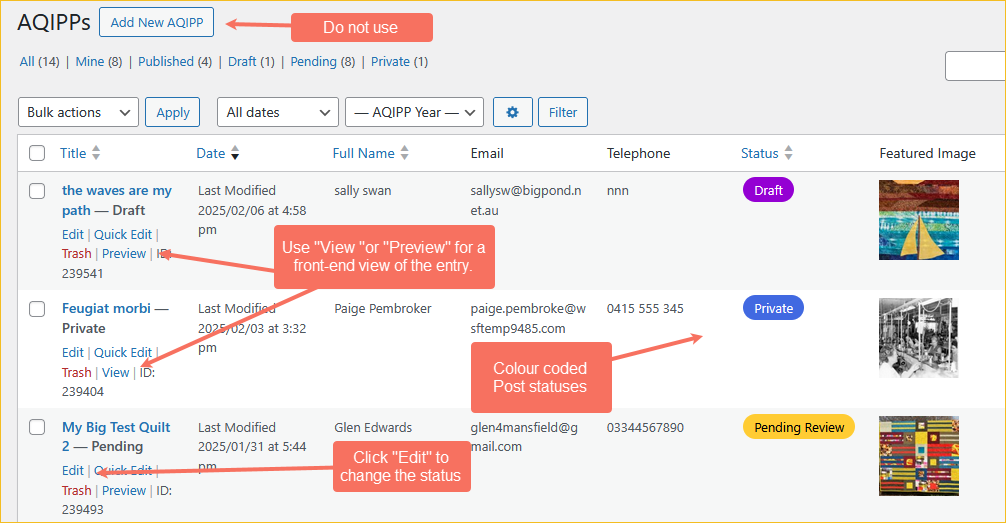
View an Entry and update the “Status”
Clicking the “Edit” link on an entry in the List Table opens its full details. This view’s main purpose is to update the entry’s status.
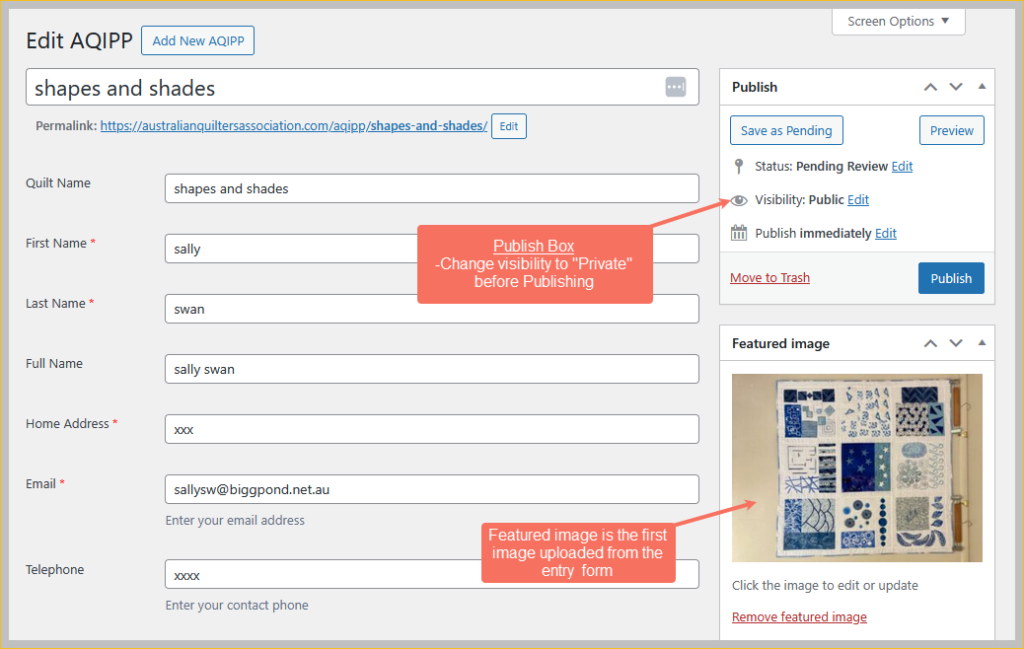
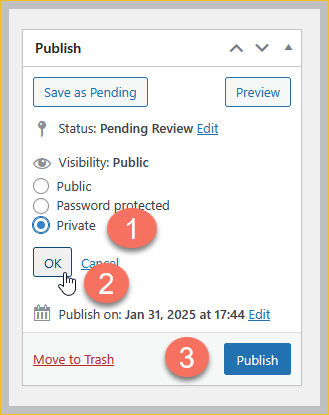
Once the Committee (Jury) has decided the fate of the entry, the status should be updated. This step is achieved in the “Publish” box.
- 1. Change the visibility to “Private”. Privately published entries are only visible to the AQIPP Committee on the website’s front-end.
- 2. Click “OK” to save selection.
- 3. Click the “Publish” button. The entry is now visible to the AQIPP Committee on the front end and in the reports.
Emails
The solution generates two emails, one for the AQIPP mailbox and the other for the applicant.
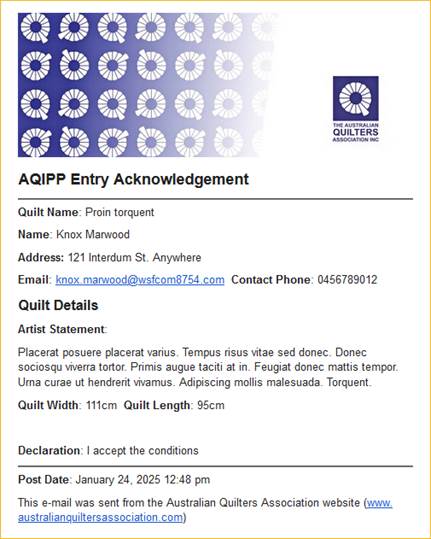
Applicant Submission Acknowledgement Email
Receipt of entry forms will be acknowledged by a return e-mail. Here is an example of the email received by the applicant.
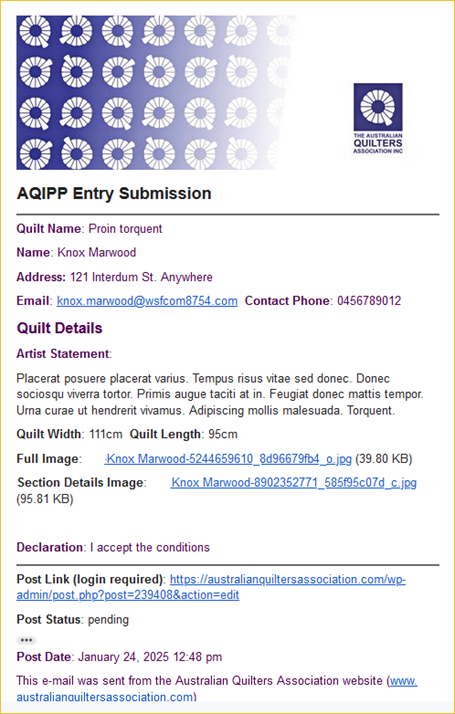
AQIPP Submission Email
This sample email is sent to the AQIPP email account upon submission. The email includes these features:
- All captured data.
- Active links to the images.
- A direct link to the AQIPP post.
Back-end Reports
AQIPP Committee members can create reports (in CSV format) for exporting into a spreadsheet. These reports may be analysed in a spreadsheet or used in a mail merge.
Use the filters to refine the download list. All entries awaiting jury selection will display a Pending status. Accepted entries are marked with a Private status.

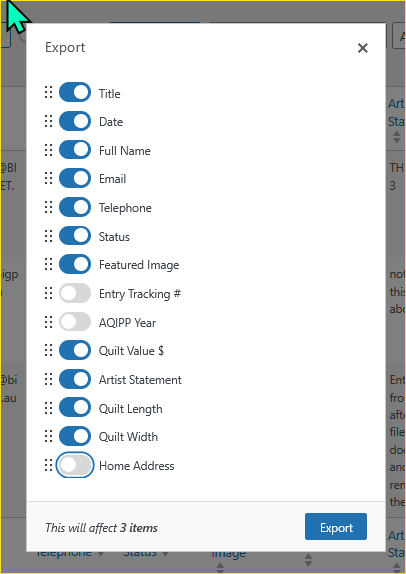
Click the left-hand check boxes to select individual entries or the Title to select all of the filtered entries. Next, click the Export button. The Export popup is where you may refine the fields to download. In this example, we have removed three fields.
Clicking the Export button will download a list in CSV file format to your computer.
Why are my photos rotated when I upload?
Photos taken with a smartphone or digital camera contain “Exif data,” which includes all sorts of details about where the photo was taken, when it was taken, and even how the camera was oriented. When uploaded to File Manager, this data is preserved, often causing the orientation of the picture to be rotated. This issue seems to occur most frequently when uploading images from iPhone or other iOS devices.
How to Fix Upside Down or Flipped Images in the WordPress Media Library
You can do basic image editing in the admin area of your WordPress website, including rotating images or flipping them vertically. This lets you fix upside down or flipped images in WordPress without having to install any extra plugins.
To rotate or flip an image, simply open the WordPress media library by clicking on Media » Library in the left-hand menu.
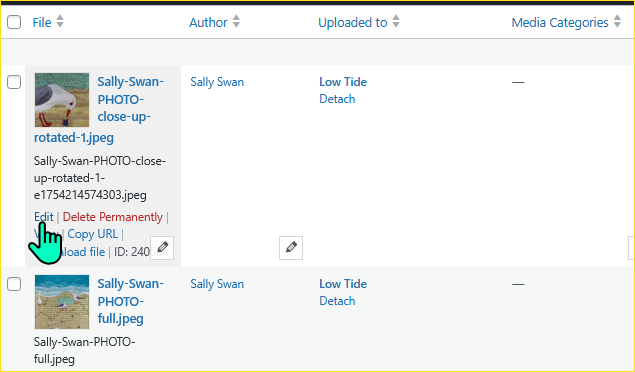
You can then click on the upside down or flipped image that you want to rotate.
WordPress will now show some basic settings that you can use to edit the image, such as adding title attributes to images in WordPress or adding image alt text.
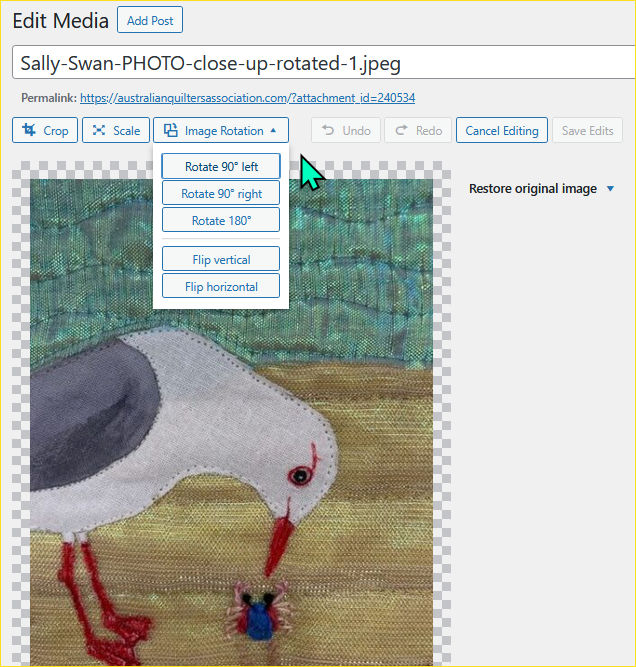
To rotate or flip the image, just click on the Edit Image button.

To rotate the image clockwise, just click on the ‘Rotate right’ button. To rotate it counter-clockwise, click on the ‘Rotate left’ button instead.
The live preview will update automatically, so you can tinker with the settings until you’re happy with how the image looks.
Once you’re finished, click the ‘Save’ button at the bottom of the image to save your changes. If you make a mistake while editing, simply keep clicking the Undo button to reverse each change until you’re happy with how the image looks.